And how do you keep your feet on the ground when you know.....that you were born to fly
What a perfect song for this exiting time in my life. Things I have been blessed with this year:
Earning my RRT credential
Marrying my best friend in Vegas
Working at SMH, my first job as a RRT
Graduating with my BS from The University of Arkansas for Medical Sciences
Earning my asthma educator credential
Buying our first home
Buying our puppy, Cruz, as a playmate for Macy
Turning 22
Traveling to Tampa for Tim's birthday
Thanksgiving with both families together
Enjoying the days before Christmas with family
And the newest thing I'm thankful for:
I am the newest RRT at Arkansas Children's Hospital!
Tomorrow is my last full time workday at SMH. It is kind of bitter sweet for a few reasons. SMH was my first job while I was still in school, and then I was lucky enough to be offered a full time position after graduation.
I have learned so much from being there and working with my coworkers.
I have made some amazing friends all over the hospital, and I will always cherish them. I can't wait to start at ACH and get to know even more amazing people.
I am so happy and proud to say that I love what I do.
Here is to a new chapter in my life.
I know I was born to do great things, I was born to fly.
Wednesday, December 28, 2011
Thursday, December 15, 2011
Yarn. What a beautiful, wonderful material. I have been enthralled with yarn, knitting, and crocheting for as long as I can remember. My Great Aunt Mary taught me to knit when I was in fifth or sixth grade. Shortly after that my [godmother] Mary (in brackets because I don't actually have godparents but if I did Don and Mary would surely be them) taught me how to crochet. Both skills have stayed with me to this day.
Here in Arkansas I haven't really found many friends who are too in to crafting. Most of the women that I find that knit are older than me. Don't get me wrong, I would love to sit in on some knitting sessions, but I wouldn't want to make anyone uncomfortable when I am the baby in the room. However, I have been spending a lot of time in a wonderful shop up in the Heights called The Yarn Mart. It has always been so easy to just pick up cheap yarn from places like Hobby Lobby, Michaels, and even Walmart. But then I discovered this little slice of heaven right here in Central Arkansas.
I could seriously spend, and in fact I have, hours and hours of my time just looking and feeling the luxurious yarns they have in their little shop. I am so grateful that I found them!!
One thing I love about the shop is their instruction. If you have any questions about a pattern or a stitch, they are more than welcome to help you in any way. They also have classes that you can attend, and these wonderful little get-togethers called Knit-a-long's. Well, the one beginning in January is a sweater knit-a-long and I knew I just had to participate. They take very few people, so I am SOO thankful that I got my name in quick! It was full within 36 hours!

So, while I was there gathering my supplies for my upcoming sweater project (don't worry, I'll blog ALL about it!), I was speaking with some of the ladies about how they organize their knitting needles. Believe me, when you start accumulating them, especially circular needles, they end up a huge ball of mess!! They told me the different ways that they organize them, and showed me a few items they had for sale in the shop. Here is a great solution that I ended up buying for double points.
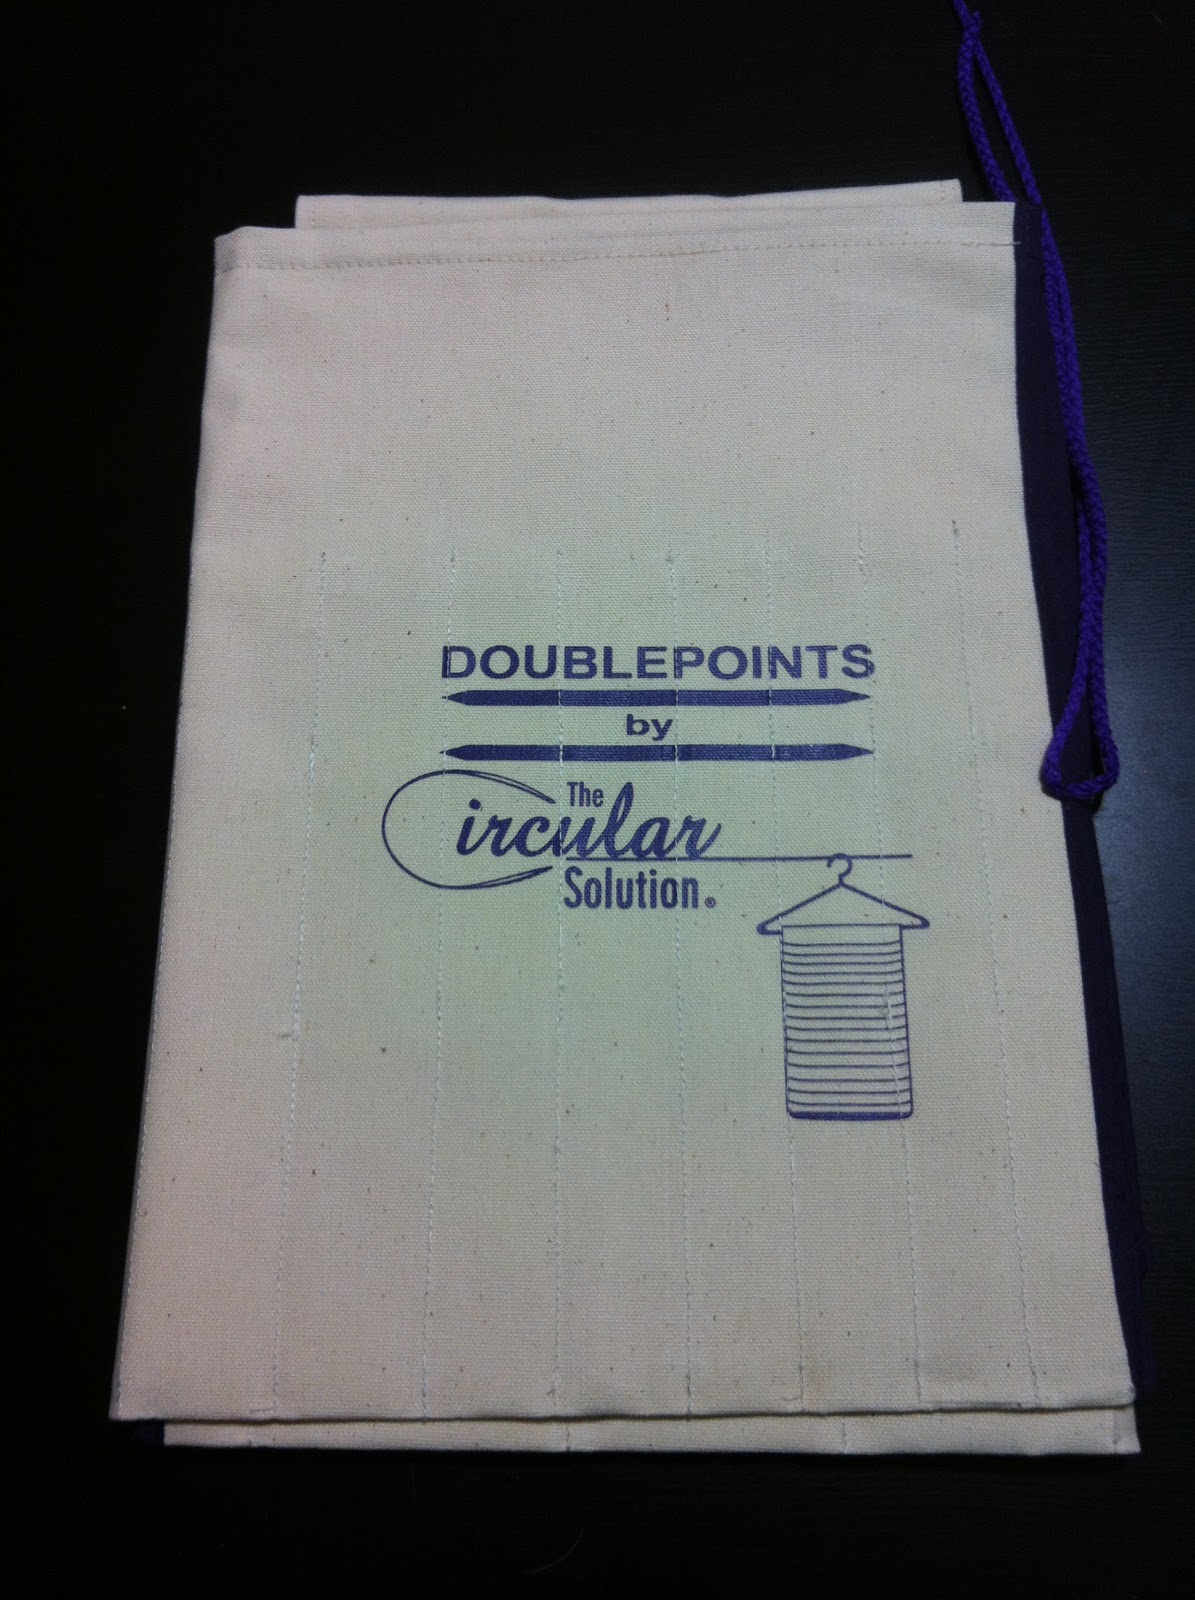
Because I don't have a HUGE stash of needles, I decided to use it as well for my crochet hooks. One great thing about this is you can organize them by size. A lot of my double points don't have what size they are anywhere on the needle. Kind of frustrating when you are trying to find the size you need!! So here is the picture for now, with my dp's and some hooks mixed in as well. I wanted to use it for my straight needles too, but they are too long!! Oh well, I will find a solution eventually!

The brand that makes this organizer also has one for circular needles. Because I think that Tim wouldn't appreciate how much money it cost, I decided to only invest in the dp holder, and attempt a circular holder on my own. So, here is the down and dirty on my new holder!!

Take a fabric of your choosing. This is just cotton fabric that I had left over from my chair rehab project. Double the length of what you want the end to be because this will be folded over in half.

Put your right sides together.

I zig-zagged stitched all the way across the open seam.

Put your hand through the middle, and turn the whole piece inside out. At this point I would to press the piece.

At each end, I had unfinished seams that I didn't want showing. So, I tucked them in on themselves.

After getting them tucked in, I sewed a straight stitch right across the bottom. Voila. Finished edge.

After that was done, I folded the whole piece in half. Using the markings on my sewing machine, I lined up the piece and starting making straight stitches all the way across. I did a few rows at the one inch mark, and then gradually made the spaces bigger for the larger needles I have.

Here is the finished piece, all you do is slide the circular right through the opening and the needles will hang on either side!

One great thing about this set up is the hopefully won't get as tangled, and they won't get all kinky from being rolled up tightly!

Also, these ChiaoGoo needles are my new addiction for circulars. I never really liked the metal straight needles so I never tried these, but let me tell you I'm never going back. They are weighted so the wire in between the two needles never kinks up while I'm working!! Please, please try this brand out, it will change your circular knitting life! And thank you Yarn Mart for introducing me!!
Hope you go out and try this, it is a great way to organize your needles, and it is SO simple!!
Wednesday, November 30, 2011
Something I have been thinking of doing lately is getting another chair specifically for my craft desk. Currently, I have just been moving the chair over from the computer desk every time I want to sit and craft. I decided that I would just keep my eye out for a good chair. It just so happened that I came across a nice office chair for $7 at my local GoodWill store here in Bryant. I immediately snatched that puppy up. It was a little dingy, so I decided to put some new fabric on!!

So here is the chair before I did anything. Like I said, kind of dingy. Usually you can just unscrew the seat and the seat back, and so that is what I did!! The seat back has a black plastic covering on the back side of it, and once it was unscrewed the plastic part just popped right off. Now, you could spend the time taking all of the staples out and removing the old fabric, but I decided just to staple my new fabric right over it. I cut the fabric so there was about 2 inches of overhang around all four sides.

Starting with the long sides and keeping the fabric taught, I began stapling with my handy dandy staple gun. I used quarter inch staples. You want to keep the fabric taught, but not really tight because it could cause the fabric to ripple. Think of trying to fit yourself in to too skinny jeans and the ripple effect across the front. Don't want any of that going on. Anyways, as you go around the corners, make little pleats. This will make sure that the fabric stays smooth around the edges.

Here is the finished beauty!! I absolutely love it, and I think it fits in just perfect! Now go out and try your own!!
Sunday, November 27, 2011
Well, lately I haven't been blogging much. Just have been working and neglecting my growing mess of a craft room. So, I thought I would give an update post about the crafts I have been doing lately. This is absolutely a post in an effort to procrastinate cleaning up. My parents went on a trip to the East Coast a few weeks ago to go to an artist workshop for my mother. After they were done they got to go down the coast, and visited many points between Myrtle Beach and St. Petersburg. While in St. Petersburg, they visited my aunt who is a major crafter herself. My parents surprised me with a HUGE gift from my wonderful aunt - about a billion different colored buttons, some thread, some ribbon, and the best gift.....a SERGER!!!! Holy moly my dreams came true. I have been wanting a serger for so long, but they are just out of my price range for now. But now, thanks to her, I have one of my very own! I can't wait to start learning how to use it, the possibilities are endless! To thank her, I sent her this festive holiday card using some of the buttons that she gave me. I hope she loves it!

Pinterest is my new addiction, as I am sure it is for all of you other crafters out there. It is just such an amazing way for us to share different projects!! It is also a great way for me to get ideas! So many tutorials out there. If you don't have an account, please let me know and I will send you an invite! One of the things I have gotten kind of addicted to making are these cute woven ribbon headbands. I now have three. Before I was just experimenting with one ribbon, but the headband below is two ribbons woven together. I love making them, and they take about 10 minutes to make! Easy and cute!

I wanted to make a cute centerpiece that was very simple but christmas-y for our kitchen table. Another idea that I found many people doing on pinterest are these beautiful candles. Supplies: candles of your color choice, double sided tape, glitter, and a paint brush. Carefully place the double sided tape all the way around the candle in whatever design you choose. Then pour the glitter over the stickyness, making sure every part is covered. After you have it all covered, brush off the excess glitter with the paint brush. The glitter left will be very stuck on the tape and shouldn't shed much. I placed my candles on a mirror and put on the table!

The hospital that I work at was having a Christmas wreath auction with the proceeds benefiting the hospitals foundation. Each department made a wreath, then they were hung in our atrium and people bid on them. Since I am the crafty one of the respiratory therapist, I naturally did the wreath. Unfortunately, the wreath sold for $20 less then what it cost me to make it.....but it was the joy of making it that counts. I wish I could have kept it for myself!!

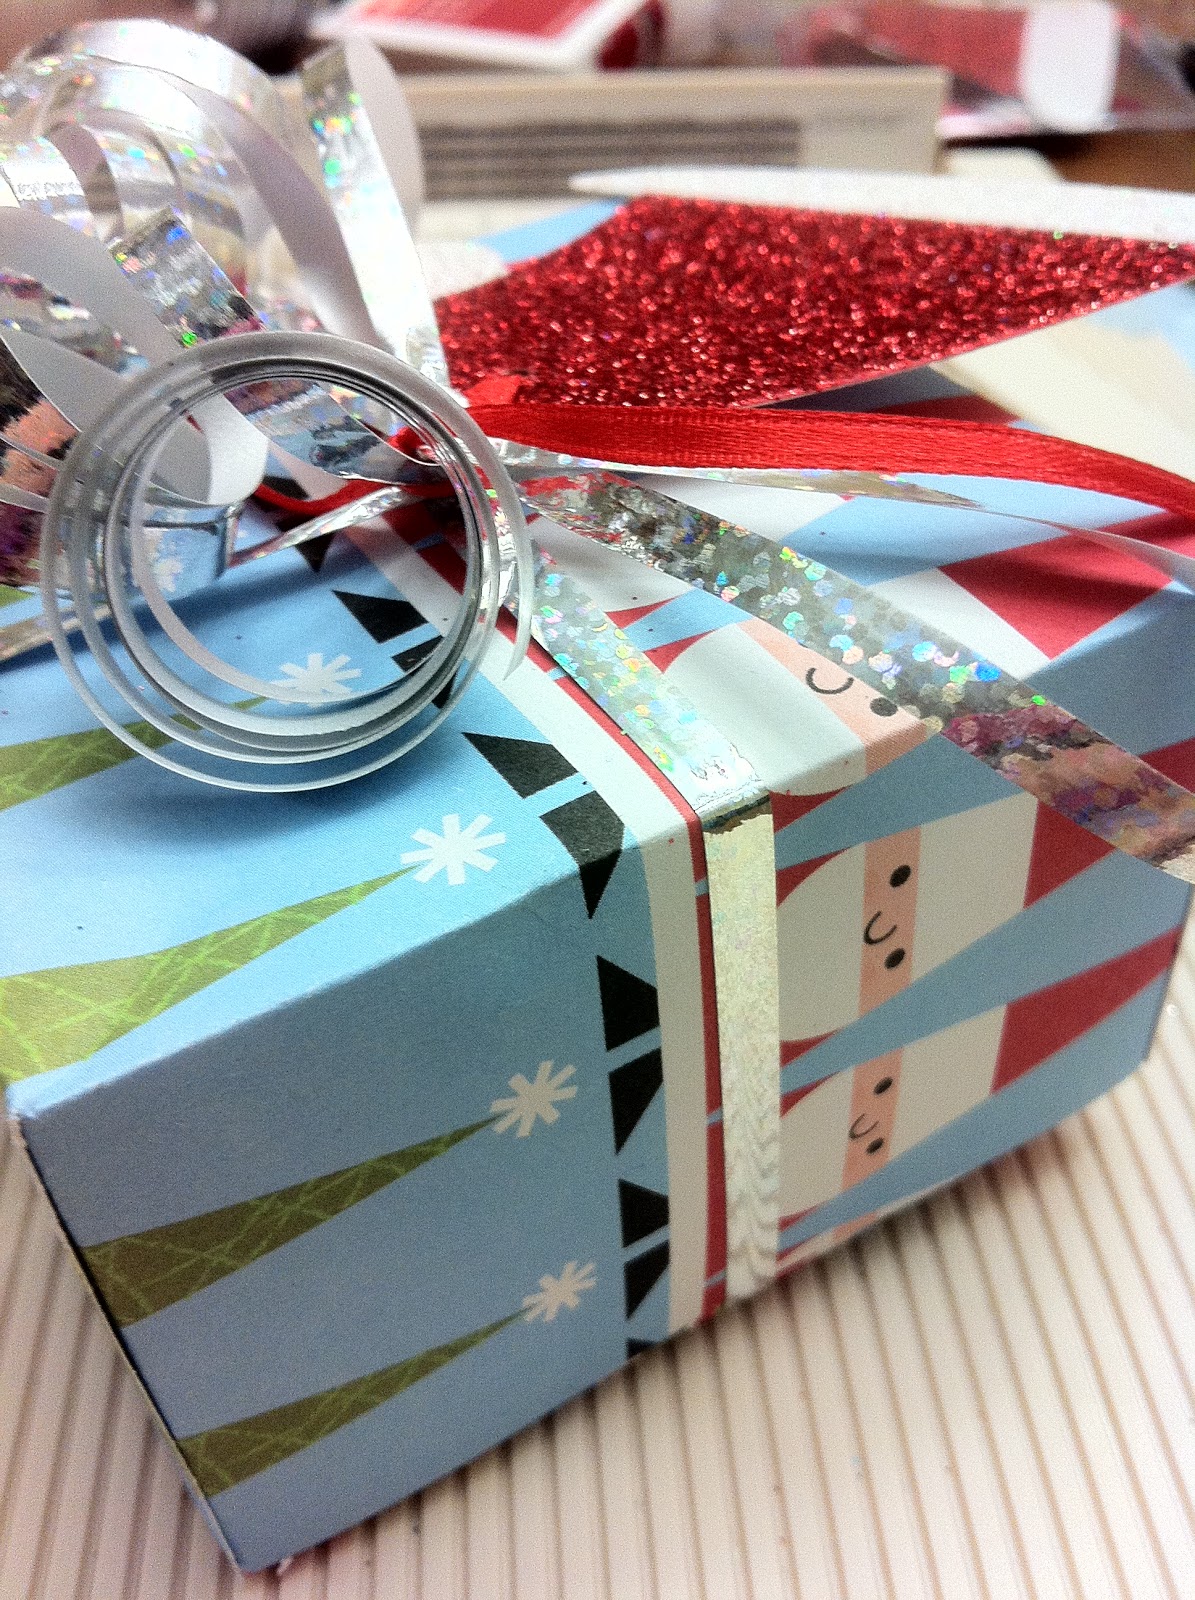
About a year ago after Christmas, I bought a Martha Stewart scoring board. This thing is so wonderful. I use it to make envelopes and gift boxes, and any other paper craft you can think of! Here is a cute little gift box I made the other day. Love the cute little Santas!!
The joy of working at a small hospital is that you tend to make good friends with your coworkers. One of the nurses in the ICU, Julie, I got pretty close with. She is the one who introduced me to Shakeology, and got me working out again. Her husband got a very large promotion and they had to move to Oklahoma. I am very bummed about it. A few of the nurses and I put on a little going away party for her on her last day of work. I made this canvas for her and brought it to work.

To give her something to remember us by, I had us all put our thumb print on the canvas and write our names by it.

Here is the card I made with directions: "Give Julie a thumbs up for all her hard work at SMH!! Please leave your thumb print and name so Julie has something to remember you! We will miss you, Julie!!"

I really enjoy my job, and one thing I love doing is visiting my with my patients and their families. I met a wonderful young couple who also had a love of crafting. After sharing a few things that I love to do, she asked me if I would make her niece some Tom's. I told her that I would love to!! The school colors are black and orange, and their mascot is the lions. Here are the finished Tom's!


And last, and probably least, is a ruffle shirt that I made. I really need some work on my sewing skills, and am thinking about maybe taking some classes to learn some more techniques. Especially with my new serger, I definitely want to learn the proper way to do things!!

Well, I hope you enjoyed it. I have thoroughly enjoyed the crafting that I have been doing lately. And now to go and organize my craft room!! I may or may not have hit up Joann.com for their black friday sales, and I may or may not have a new Cricut on its way to my house!! Wahoo!!!! I can't wait.
I hope you all had a great Thanksgiving! The thing I am most thankful for this year is my wonderful husband. We have been married for eight months now, and could not be happier.
Thursday, November 17, 2011
I have totally been neglecting my blog lately. So sorry, mass amount of people who read my blog (teehee). A few weeks back I finished my first chandelier re-vamp project. It was so much fun!! I had been wanting to try this for so long, and I finally found the perfect project. While I was in Hot Springs for our State Respiratory Care Society Meeting, I stopped by the Habitat Re-Store that was right down the street from the convention center. There were a few lights, but none that really stuck out. That had been my luck at all of the Goodwill's and Re-Stores I had been to. Well, as I was leaving, this baby caught my eye! I ran away with this beaut for 20 whole dollars.

The light bulbs were all really old and most didn't work, so I knew they would have to go. Also, the cheap-o "candlestick" look wasn't doing anything for me. Anyways, I took off all of the little crystals and gave the chandelier a good rub down with some lysol wipes.

After removing all of the light bulbs, it was time to get ready to paint. You never want to paint where the light bulbs are going to screw in, so I took paper towels and smushed them down in to place. I also papertoweled and taped the end of the wire, I didn't want to mess up the part of the lamp that would make it work!!

I bought a can of Rustoleum Oil-Rubbed Nickel spray paint. I wanted a paint that would match the hardware that we already have all over our house (remember its a builders new house, so everything is the same in every room). It worked perfectly, and was so shiny in the sun!! It took just a few coats, and a lot of different angles to make sure that every surface was painted.

My dad happened to be coming by the house, so he showed me how to hook up the chandelier without frying myself. Very important step--turn on the lights in the bathroom, then go turn off the breaker, if the lights go off you know the power is off!! He and I went to Lowes and found a pretty ceiling medallion that we liked with the lamp. Here it is in its permanent home!! After it was hanging I replaced all of the bulbs (ones that had the "soft glow" effect to them) and I put all of the little hanging crystals back on. I think it looks great, and LOVE walking in to the bathroom now!!

Since we are coming up on thanksgiving, I thought I would just add a little note saying how thankful I am for my Wonderful Husband. He is truly my best friend (and he puts up with all of my projects around the house). We are so blessed to have the wonderful life that we have including owning our own home, and having our two wonderful furry children, Macy and Cruz.
 |
| Macy, 8, in back. Cruz, 7 months, in front. |
Tuesday, November 8, 2011
Sorry it has been so long since I posted last. Work has been a little crazy, and I have gotten myself in the middle of about a billion projects. I personally like to do projects that I can finish in one sitting. But I have been ambitious lately and have been doing projects that take a bit more effort. The makeover of our guest bathroom has been one of those projects. For a while it was just.....naked. No decorations. Very sad since you know.....guests happen to use the guest bathroom frequently. So, since I had the day off work today I decided to finish decorating this poor little room.

First stop is my Anthropologie inspired shower curtain. These babies sell for about $140 at the store. Not sure about most people....but I just don't have that kind of money sitting around that I can blow on a SHOWER CURTAIN. So I did some googling....and found a few tutorials that laid out the steps to make this on my own. Since I didn't follow one specific blog, I don't have one to give credit to on here. Well, turns out I am a very amateur seamstress. Having to ruffle 140 inches worth of fabric times ten...lets just say it was a job. In fact I started this project a long time ago, got frustrated, and threw it in a corner of my craft room to collect dust. Today I picked it up determined to tackle and finish it. And I did! I get a cookie. My point is, if you don't sew much, do NOT try this as your first big project, it will make you never want to see another piece of fabric ever again!! But, alas, it is finish and this beauty is now hanging with all its' glory in its forever home.

From the shower curtain project, I had leftover strips of fabric hanging around begging me to do something with them. Fabric strip rosettes are all over the blogging world right now, so I figured why not. Take your fabric strips, some felt and hot glue, and get your twist on. I decided they would look pretty cute hanging above the toilet so I added some hooks and started nailing. They look pretty okay. Not sure they are my favorite, but for now they will work.

Not sure if you can tell, but the picture in the frame is something that I made, and it is a fleur de lis. I made it by using a thumb tack and punching the design through paper. The basket is holding some extra guest towels, and a cute ball with a fleur de lis! The basket also has the cute little design all the way around. Are you sensing a theme yet??

Well just in case you didn't get it, I added these cute little fleur de lis door knobs on the cabinets below the sink to finish it off.
I absolutely love that the bathroom is finally finished!!! I feel proud to have our guests use it now. The next blog will be dedicated to the chandelier that I made and that is now hanging in our master bathroom!
Happy Tuesday, everyone!
Wednesday, October 26, 2011
Okay, so my first attempt at extreme couponing went pretty well. I ended up getting about 175 dollars worth of groceries for 45. I decided to step it up a bit for my second one which took a bit more planning. I got up at 4 this morning to make sure everything was in place for a good trip, and I was at the store at 6 when they opened. Two and a half hours later and only one mean person (checkout lady saying I couldn't do this when it was busy, to which I smiled and said "Yes ma'am thats why I got here at 6 AM"), and I got out the door feeling prety good! Here is what I got away with:
4 Large Dawn dish detergent
4 Mens Gillette body wash
16 Dole Frozen Smoothie Mixers
4 Oral B floss
4 Always thin pads
4 Tampax tampons
4 Carton Swanson Beef Broth
8 Axe body wash
4 Chest toothpaste
4 Krusteez blueberry muffin mix
6 Scotch bright dish sponges
5 Muffin tin liners
8 boxes Celestial Seasonings Tea
8 bottles Franks Hot Sauce
8 Viva paper towel rolls
8 Covergirl Lipgloss tubes
4 Covergirl Eyeshadow
76 cans assorted Campbells soup
1 gallon 2% milk
Total before coupons: $410.82
Total after coupons: $210.11
Total % savings: 48.9%
Not to bad if you ask me, and there are so many things that I bought that do not expire, so we will not need to buy again for a long time! I am pretty proud, and my stockpile is growing.
Thursday, October 13, 2011
Here in Arkansas, Fall has finally (in my opinion) arrived. When I get up in the mornings to go to work, I finally feel that crispness in the air. The feeling where a nice warm sweatshirt and a cup of hot tea sounds like just the right thing. Halloween is almost here, and most are putting out their decorations and gearing up for the soon to come candy raid. As I do not have any Halloween decorations, and we will not be home for aforementioned candy raid, I decided to do a fall wreath in honor of what matters most here in Arkansas: The Hogs. Now, to outsiders, it may seem strange....crazy even, the amount of attention one football team generates. I too thought it was pretty crazy when I first moved here. But there is something about those razorbacks that just gets you in the mood for football team spirit. I have thoroughly become a Hogs fan, and can't wait till we start producing our own little Godbold Quarterbacks (and maybe one ballerina).
The wreath that I made was SUPER SIMPLE. The best kind of craft if you are like me and like to sit down and finish a project in 1 hour or less. That is all this wreath took including the trip down the road to the store to get some supplies. I picked up a 14 inch foam wreath, three rolls of tulle ribbon, and a clear wreath holder for the door. I already had the chip board to make the words, but if you don't have any stop by your local Hobby Lobby, Michaels, or craft section of your local Walmart (granted it isn't one of the stores that has done away with the craft section...boo walmart....boo). Some scissors and a yard stick (or ruler) and I was ready to go!

I started by measuring out strips of the tulle and cutting them all at 18 inches. Feel free to make them any length that you want, get creative! I wanted a very uniform look for this wreath, so I made sure to measure. I counted out certain amounts for each color section because again, I was going for that uniform look. The more of one color you place together, the thicker the color block will be. Or be crazy and only use one color. Have fun with it! It is going to be on YOUR front door!!

Next step is pretty easy. Fold the tulle strip that you cut in half. Ta-da!

Bring the tulle under the foam ring with the loop coming to the center.
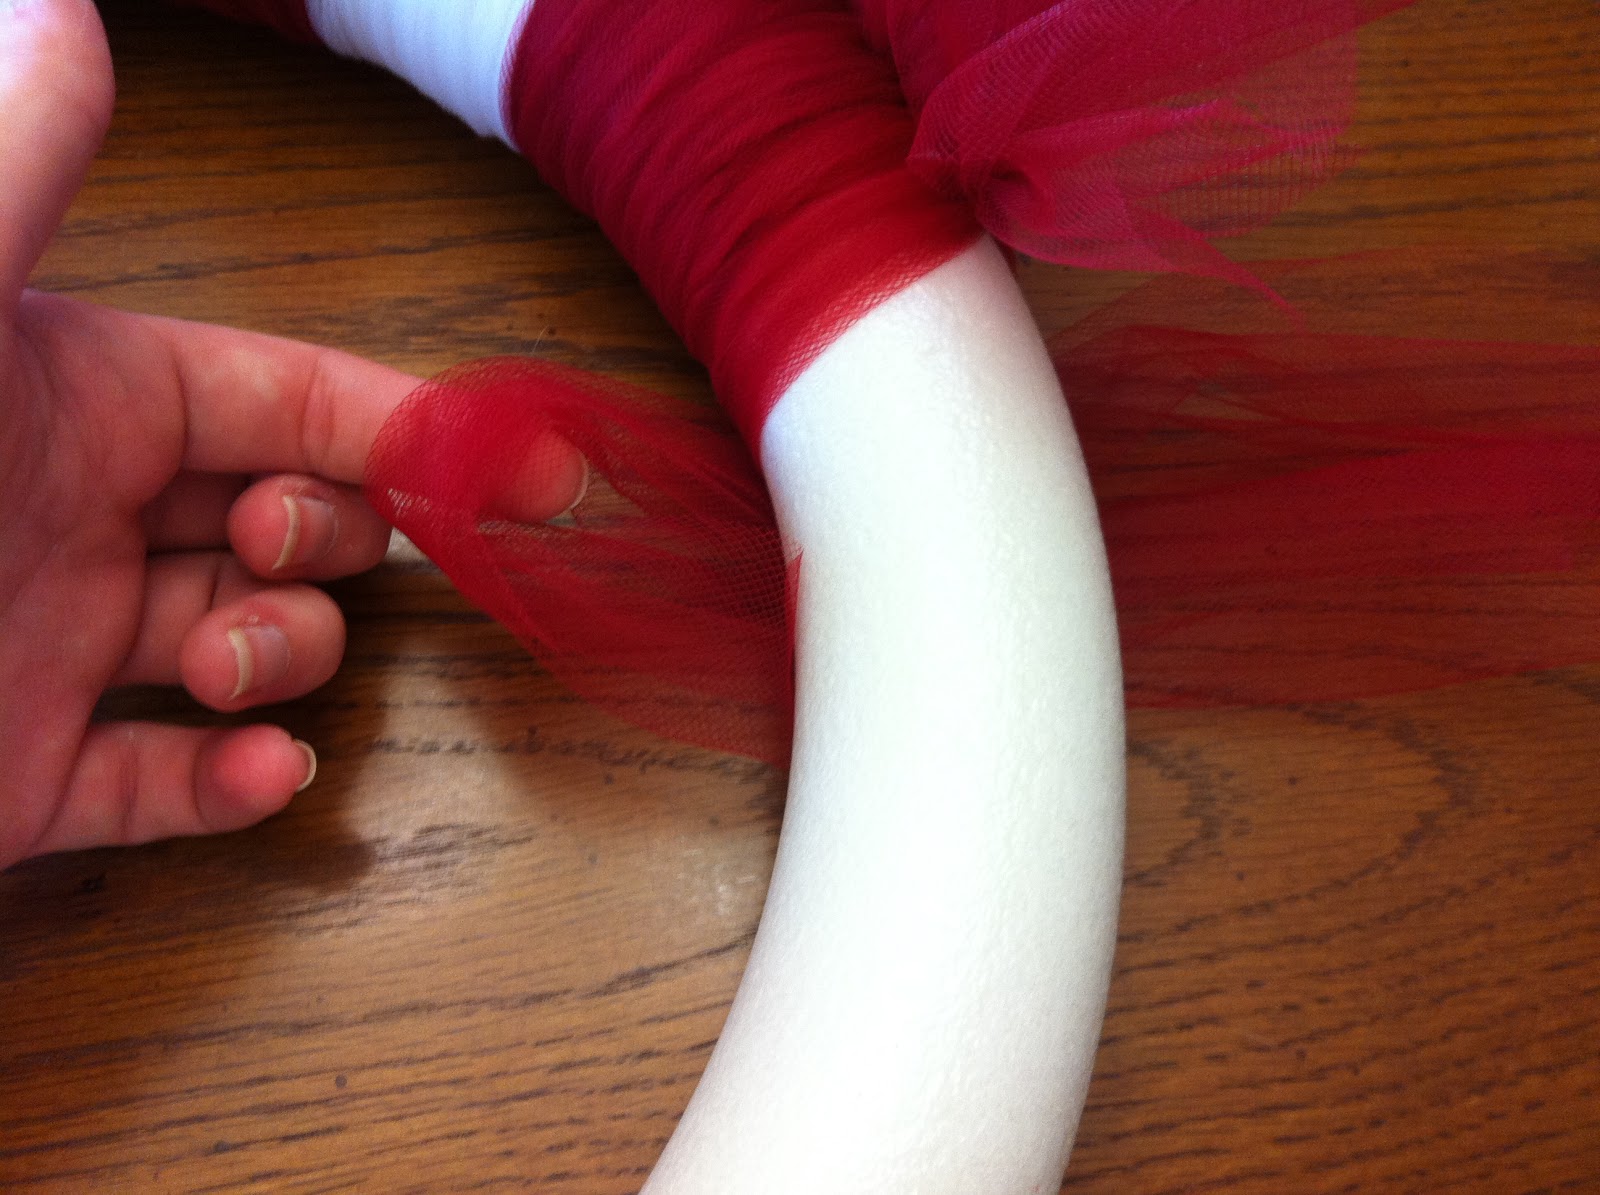
Tuck the ends of the tulle through the loop that you made when you folded it in half, and pull tight. Our front door is pretty hidden from any elements like wind, but if your door isn't I might suggest putting a dab of hot glue to secure, or even using a pin to keep everything in place.

I used the remaining tulle that I had to make a bow that I would use to hang from the hook. I geared up my handy dandy hot glue gun, got my chip board together, let it dry, and put it up!! Had a minor mishap with two of the three dogs bolting while I was making my way out the front door, so if you have escape artists like we do, watch your back...they are just waiting for their moment to run. Luckily Tim and I rounded up the pups, and the wreath was happily placed on our door.

All I have left to say is.....

Woo Pig Sooie!!
Okay all of my fab friends out there. I know you like "do-it-yourselfers" as much as I do. So imagine my surprise when I came across this wonderful company called Sweets Cosmetics. A little back story here, I went to junior high school with one of the co-creators of this business, Molly Dunkle. Far cry from OMG we were tots BFFs way back when, but I did know her and we had classes together!
So she and her business partner started this wonderful cosmetic company out of our hometown of Fort Collins, Colorado. They are all about making good for your skin cosmetics made with local products. They have a fantastic website and you should check it out (Sweets Cosmetics for those who missed the link above). They also have videos on their website promoting a Men's line including Man Balm (lip balm) and Man Bar (soap). I would totally buy these for my hubby, not sure if he would actually use them, but I'm sure there are men out there who aren't as picky about which products they use!! I am sure they have more products than listed for purchase on their site, and there is an email address you can use to contact them. They are also on Facebook, of course! I am definitely down for supporting and promoting small business owners!
Congrats girls for creating this and I wish you all the best! I can't wait to place my first order and see what all the buzz is about. I hope you go check out their website and order some sweets for yourself!
 |
| Molly Dunkle and Katie Barstow |
Congrats girls for creating this and I wish you all the best! I can't wait to place my first order and see what all the buzz is about. I hope you go check out their website and order some sweets for yourself!
Saturday, September 24, 2011
Well, as I was talking about in my previous post, all of the walls in our house are pretty....blah. Well, I take that back. They serve as a great blank canvas to decorate!! My latest project? The boring bathroom. We have such a great big tub that hangs out in between his and hers closets. I love it, but like I said, it just looked so boring. So I started thinking about what would make this part of the house unique. And what do you think of when you are taking a bath?? BUBBLES!! That thought somehow made me get in my car and I automatically drove to Michaels (funny how my hands just know the way...I could get there in my sleep).

I was wondering what I could do to make some rocking bubbles around the tub. I knew I would probably use a pen of some sort, and paint pens just seemed right. I decided to get a gold color. I wanted the design to be bold, but not overwhelming. I thought that the gold would just stand out enough against the "golden wheat" colored walls. I was thinking of either cutting out circles from cardstock, or tracing around bowls and cups to get what I wanted. Then, while wandering through the painting/drawing section of Michaels, I came across this circle drawing template. How perfect was this find?? It has 13 different sizes of circles, and it is made out of a heavier plastic so it wouldn't get ruined like cardstock would! I was a little nervous that the paint would seep under, so I got ready armed with a toilet paper roll to wipe away excess as needed.

I started off on one side of the window, and all I really did was trace random circles!! I'm glad that I got two of the paint pens, because the first one that I used was very messed up and blotted the paint every where. I decided to open the other pen and see how it worked. It was much better, and in fact, the paint didn't even seep under the template! Also, the paint dried very quickly, so I didn't have to wait at all before moving to the next circle, even if it was right next to the one I just painted.


After I got the hang of it, the project went pretty quickly. I wanted to give the illusion that the bubbles were coming up and spilling out of the tub. I think I accomplished that pretty well!! Sorry about the color of the picture...my iPhone seemed to turn it slightly green. I may need to look in to that.....

Here it is finished!! Now I just need to figure out a cute way to arrange my candles. I love orange and I got those tea lights as a wedding gift. And they smell like mango. Yumm. I'm sure I will be able to find a way to use them! Here is the cost break down for this project:
Gold Paint Pens - $1.99 (x2, so around $4)
Circle Drawing Template - $5 (plus 40% off coupon, so around $3)
Total - around seven dollars!
Now go make a boring room in your house a little more bubbly!
Subscribe to:
Posts (Atom)


